Popular


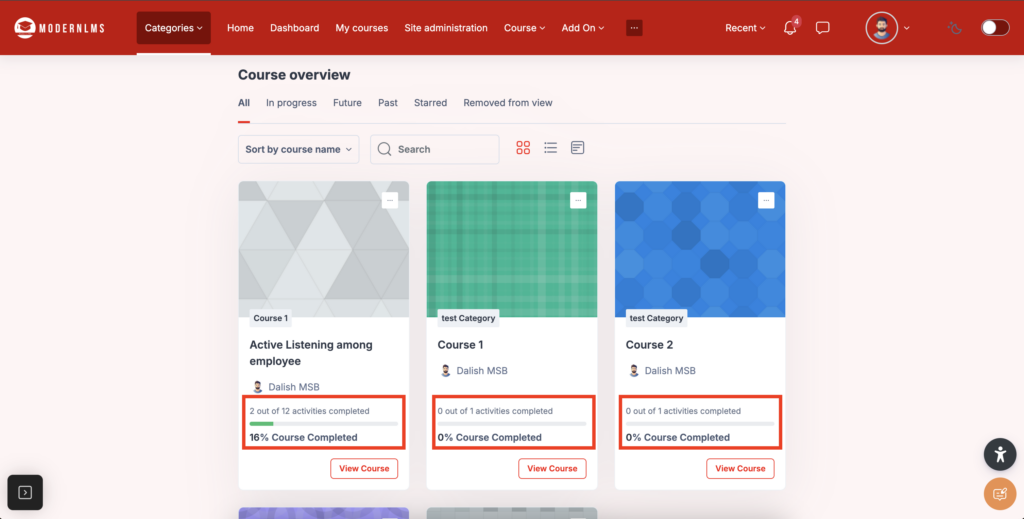
Completion tracking is important because it helps monitor and ensure that students are progressing through the learning materials as intended. It allows instructors to:
- Ensure Accountability: By setting completion conditions, students are required to meet specific criteria before progressing, which ensures they engage fully with the content.
- Track Learning Progress: It helps instructors track whether students are completing tasks, achieving required grades, or meeting other learning objectives.
- Personalize Learning: Completion conditions can be tailored to individual student needs, allowing for customized learning paths and better support for students who may need additional help.
- Enhance Engagement: With automatic tracking, instructors can identify students who may be falling behind or not completing the necessary activities, enabling timely interventions.
- Provide Clear Feedback: It allows for clear reporting and feedback to both students and instructors about progress, completion, and any gaps in learning.
Overall, completion tracking ensures a structured, accountable, and personalized learning experience, improving both student outcomes and course management.
_______________________________________________________________________________
1. Completion Conditions
- Enable the editing mode on the respective course
- Go to the ‘Completion Conditions’ Section:
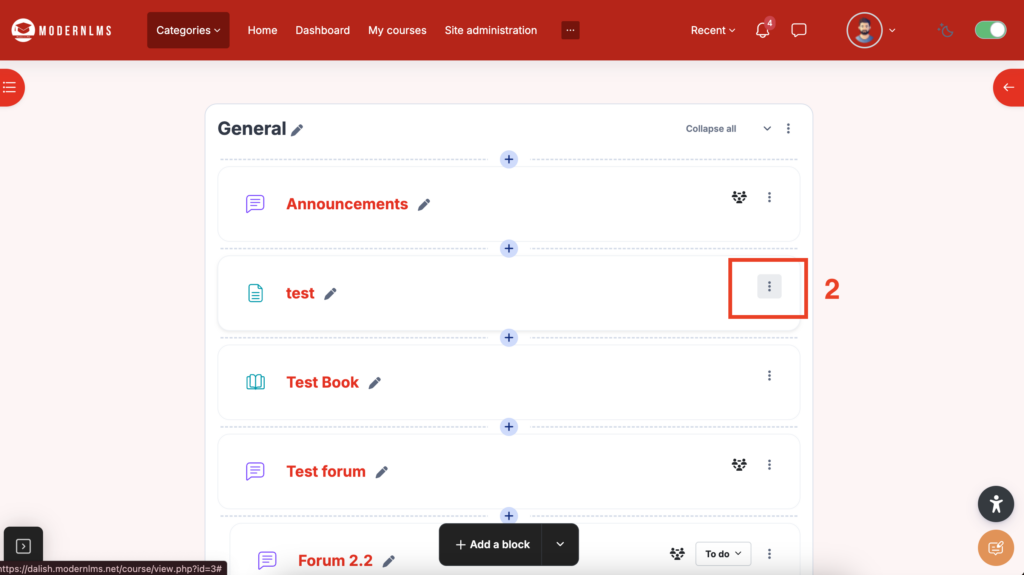
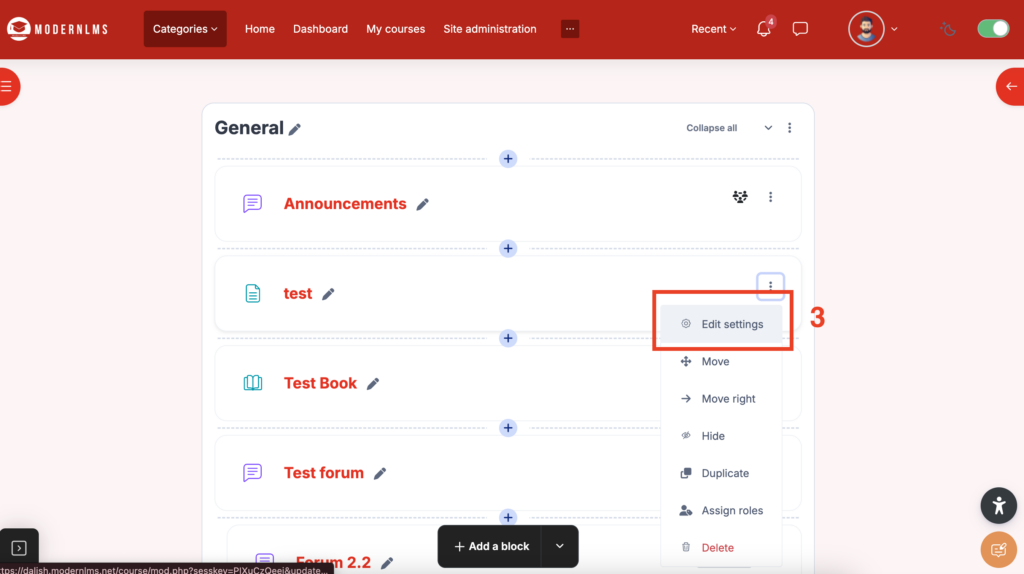
- Click at 3 dot of your activity/resource and select “Edit settings”.
- In the settings page of your activity/resource, scroll to the Completion Conditions section.
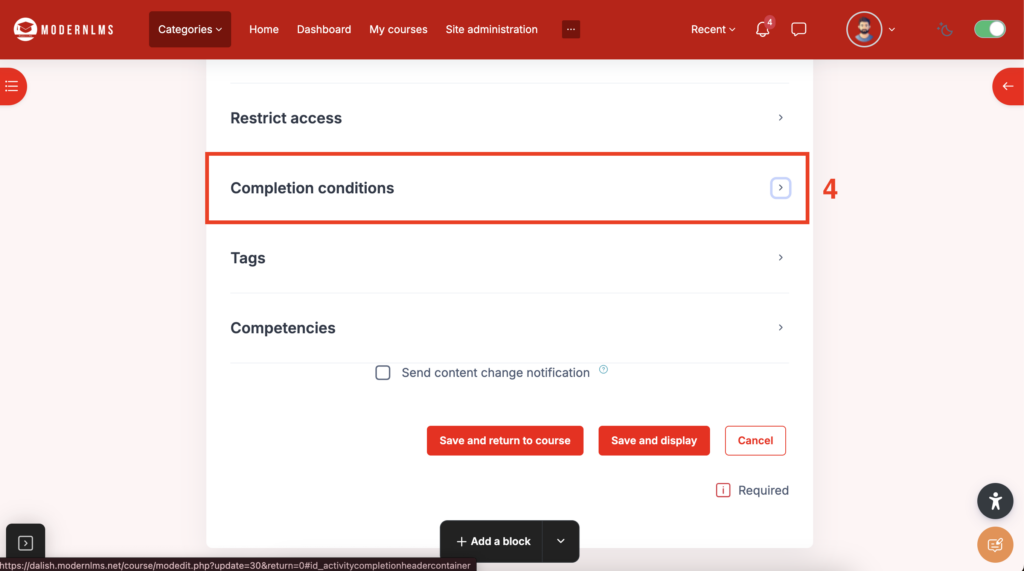
- Click at 3 dot of your activity/resource and select “Edit settings”.
- Choose Completion Criteria:
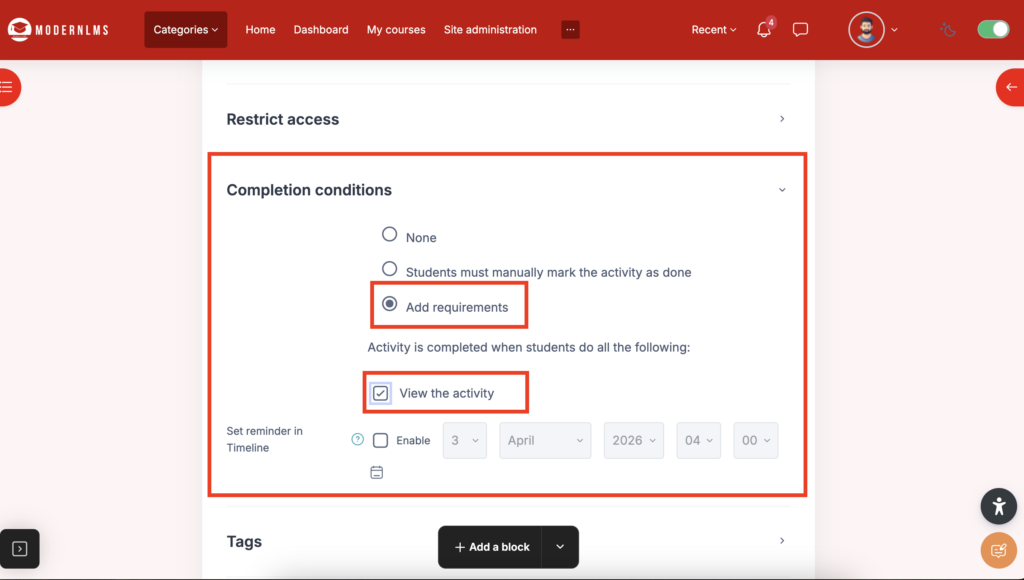
- There are three options under Completion Conditions:
- None: No completion conditions are applied.
- Students must manually mark the activity as done: Students will have to click a button to mark the activity as complete.
- Add requirements: Allows you to add specific requirements for completion, such as requiring students to view a certain number of pages, complete a quiz, or participate in an activity.
- There are three options under Completion Conditions:
- Set the Criteria (if using ‘Add requirements’):
- If you select Add requirements, you will need to specify the conditions. For example:
- Viewing the activity
- Reaching a certain grade
- Submitting a quiz
- Scoring above a specific percentage
- If you select Add requirements, you will need to specify the conditions. For example:
- Save the Settings:
- After configuring the completion conditions, ensure you save the settings to apply the changes “Save and return to course”.
2. Restrict Access
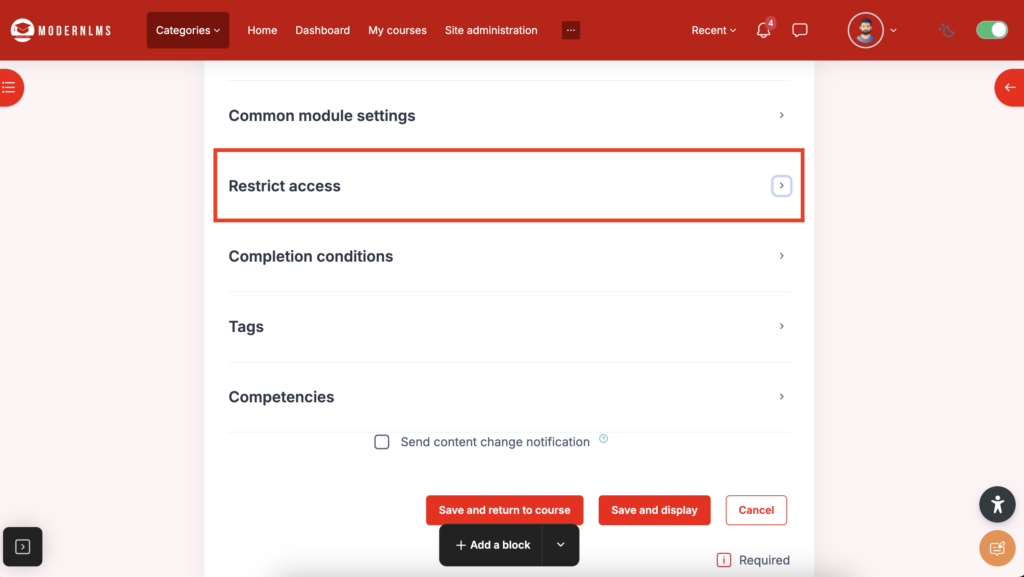
- Go to the Activity Settings:
- Click at 3 dot of your activity/resource and select “Edit settings”.
- Click at 3 dot of your activity/resource and select “Edit settings”.
- Locate the ‘Restrict Access’ Section:
- Scroll down until you see the “Restrict access” section.
- Scroll down until you see the “Restrict access” section.
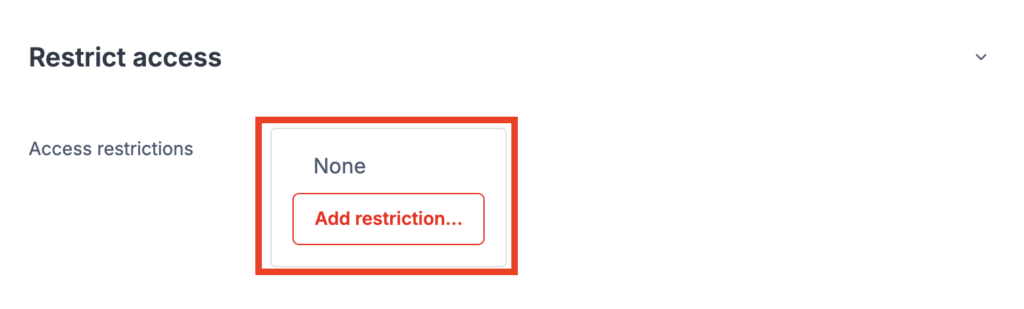
- Add Restriction:
- Click the red button that says “Add restriction…”.
- Click the red button that says “Add restriction…”.
- Choose the Restriction Type:
- From the drop-down menu, select the type of restriction you want to apply. There are several types of restrictions, such as:
- Date: Restrict access based on a specific date or time range.
- Grade: Limit access based on a student’s grade or score in another activity.
- User Profile: Restrict access based on the user’s profile field.
- Completion Criteria: Limit access based on the completion of other activities or courses.
- Group or Groupings: Restrict access to certain groups or groupings.
- Activity completion: Restrict access to student completion.
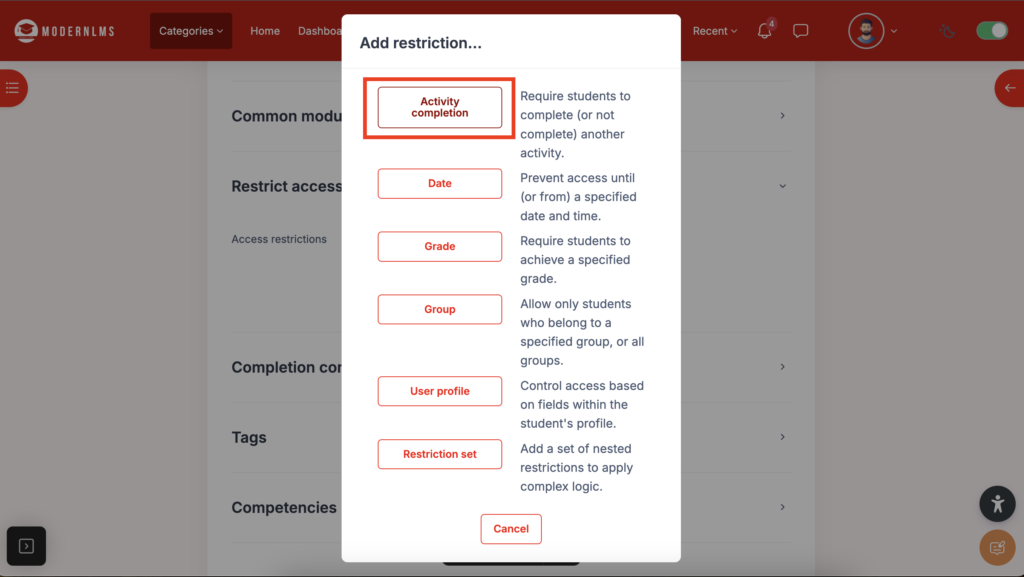
- From the drop-down menu, select the type of restriction you want to apply. There are several types of restrictions, such as:
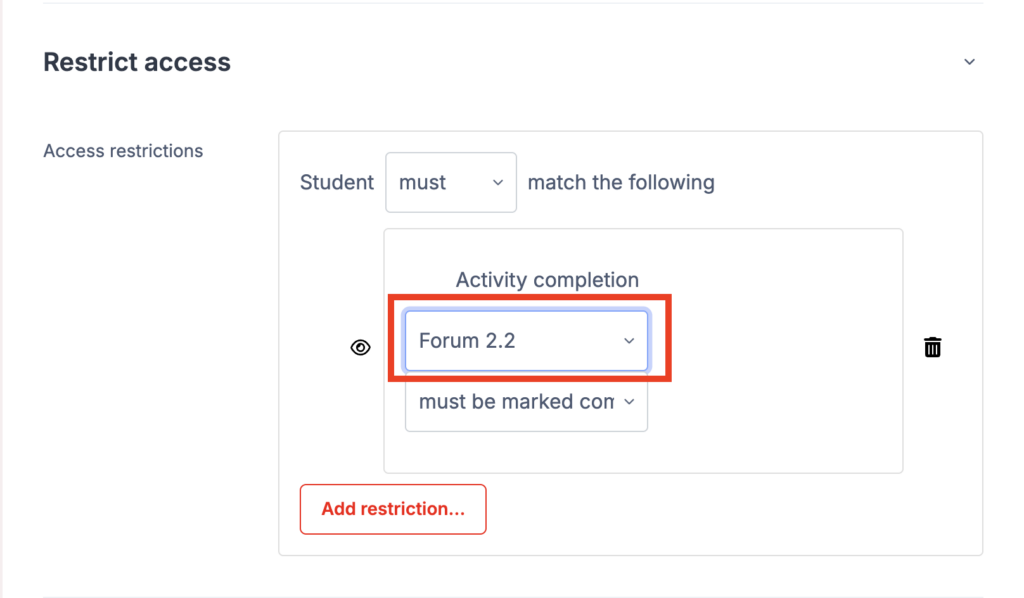
- Set Restriction Criteria:
- After selecting the restriction type, fill in the required fields based on the restriction you selected.
- For example, if you choose Activity completion, you will need to specify the activity.
- Save:
Save the Settings:- After configuring the completion conditions, ensure you save the settings to apply the changes “Save and return to course”.

- After configuring the completion conditions, ensure you save the settings to apply the changes “Save and return to course”.
3. Testing and Monitoring
- After applying restrictions and completion conditions, test the setup to ensure it works as expected. Log in as a student or use a test account to verify that the restrictions are being enforced and the completion conditions are correctly tracked.
- Monitor the completion progress of students through the My Course section in your LMS. You can track completion data for each activity and student.
